
Introduction
This Totoro plushie was my first foray into the world of amigurumi (am-ig-uh-ROO-mee). For those not in the know, amigurumi is the Japanese crochet technique of making plushies.
You use a smaller hook size that usual to create tight and stiff stiches. For example of DK weight yarn, you would use a 3 mm or 3.5 mm hook. The smaller stitches ensure that the stuffing material stays inside your plushie.
Totoro
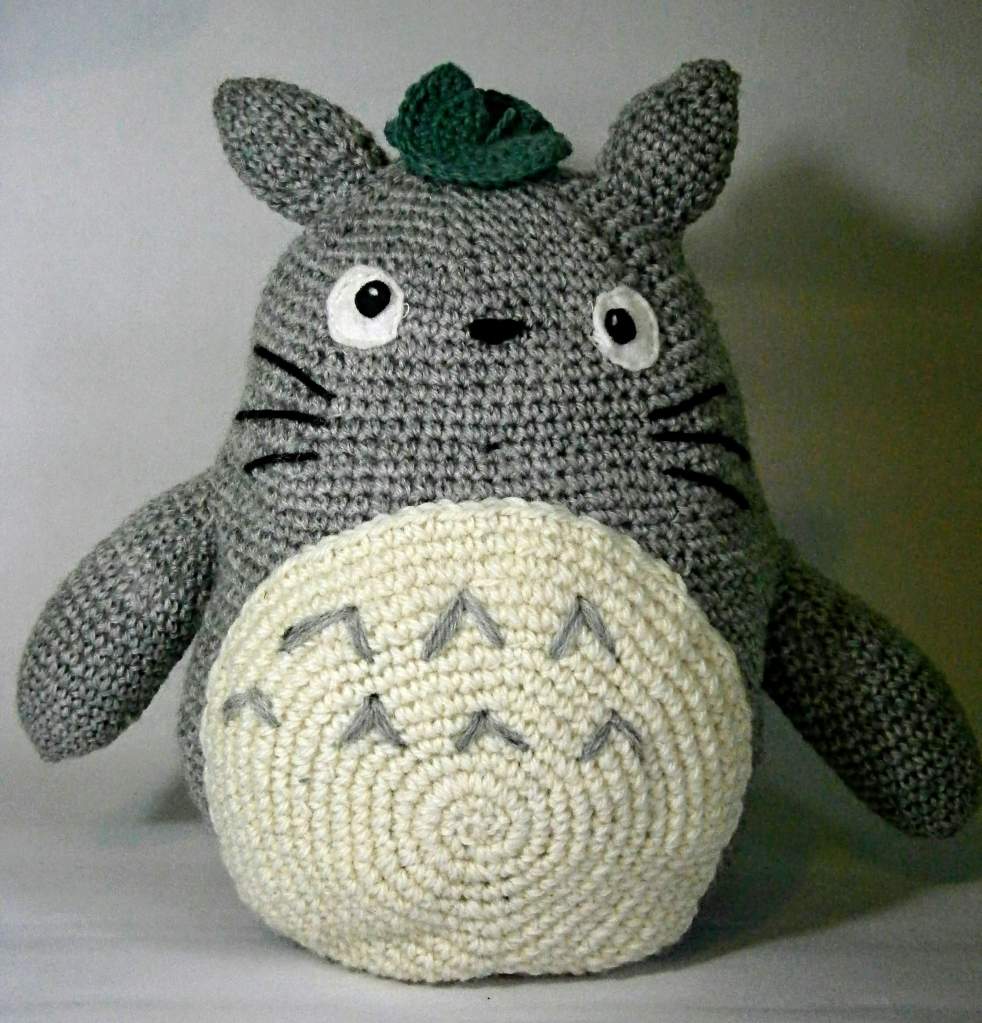
Totoro is the main charater in the Studio Ghibli film My Neighbour Totoro (1988). Stuidio Ghibli films are filled with magical creatures with Totoro being a large forest sprite. There are also two smaller Totoro’s, the Blue Totoro which we first see in the film carrying a sack and a small White Totoro who follows.
Although I hae the patterns for the Blue and White Totoro, I have only made the large grey Totoro. To make this plush Totoro, I used the pattern by Lucy Ravensacr. Unfortunately, the pattern is no longer available to download. However, similar pattens are available from Amigurumi All Free Patterns and Amigurumi Northalia.
I spent several summers making this whilst I was an undergraduate student. I started the project in 2012 and finished it in 2014. It felt like a slog as used a printed version of the pattern and did not have access to video tutorials due to the poor rural internet connection. I ended up unraveling (frogging) the body several times as I had miscounted the stitches. I was also using a piece of yarn as a stich marker which kept falling out. I now have a set of colourful stich markers to help me keep my place.
Amigurumi Mistakes
As this was my first attempt at making an amigurumi, I made the following mistakes so you don’t have to.
- Hook size too large
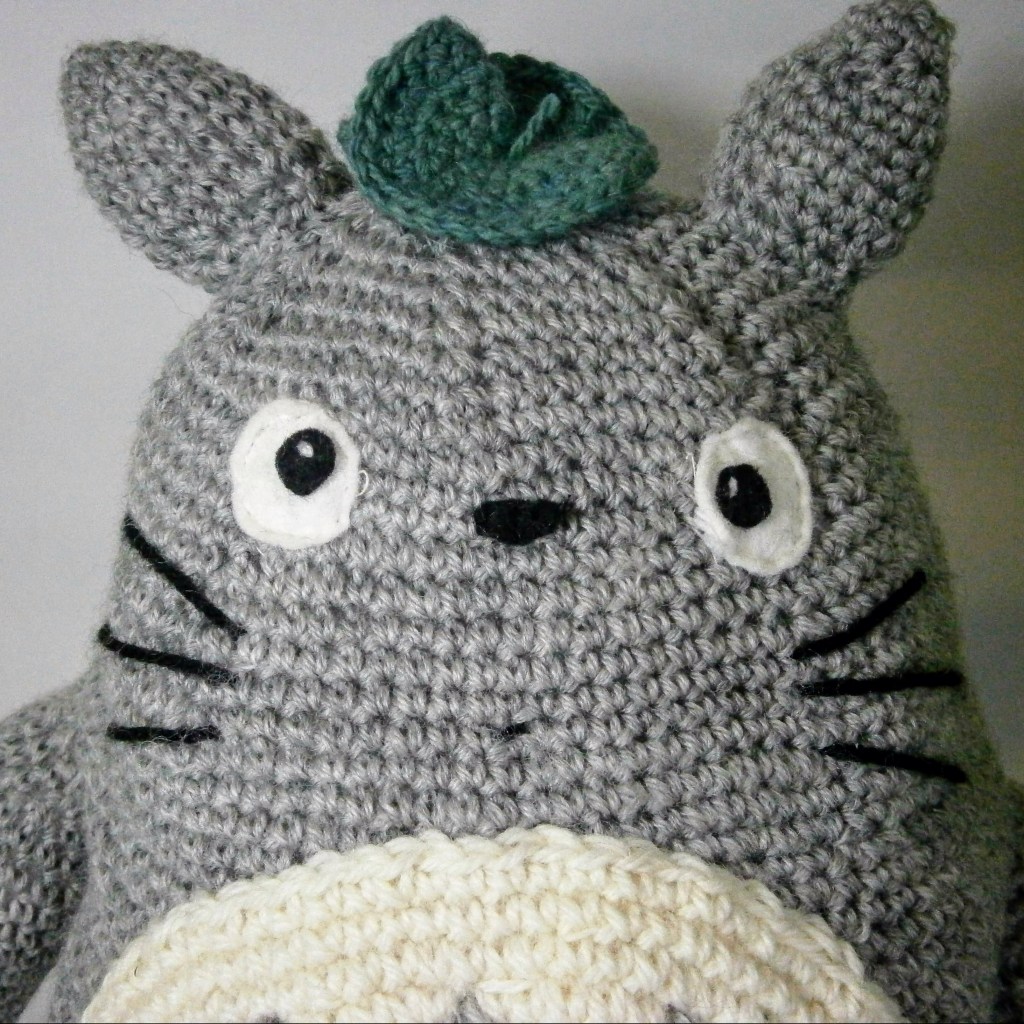
I used a cotton DK yarn and a 4.5 mm hook. From the photos, you can see some gaps in-between the stitches where the stuffing is peeking through. To prevent this, I now use a 3 mm or event a 2.5 mm hook when making amigurumi’s. - Underestimating the amount of yarn
I orgininally bought 3 balls of yarn for this project which was not enough. When I went back to my local yarn shop to buy more, they had sold out of that shade. I then had to order online and pay postage, so the final ball of yarn ended up costing the same as the first 3! - Not enough stuffing
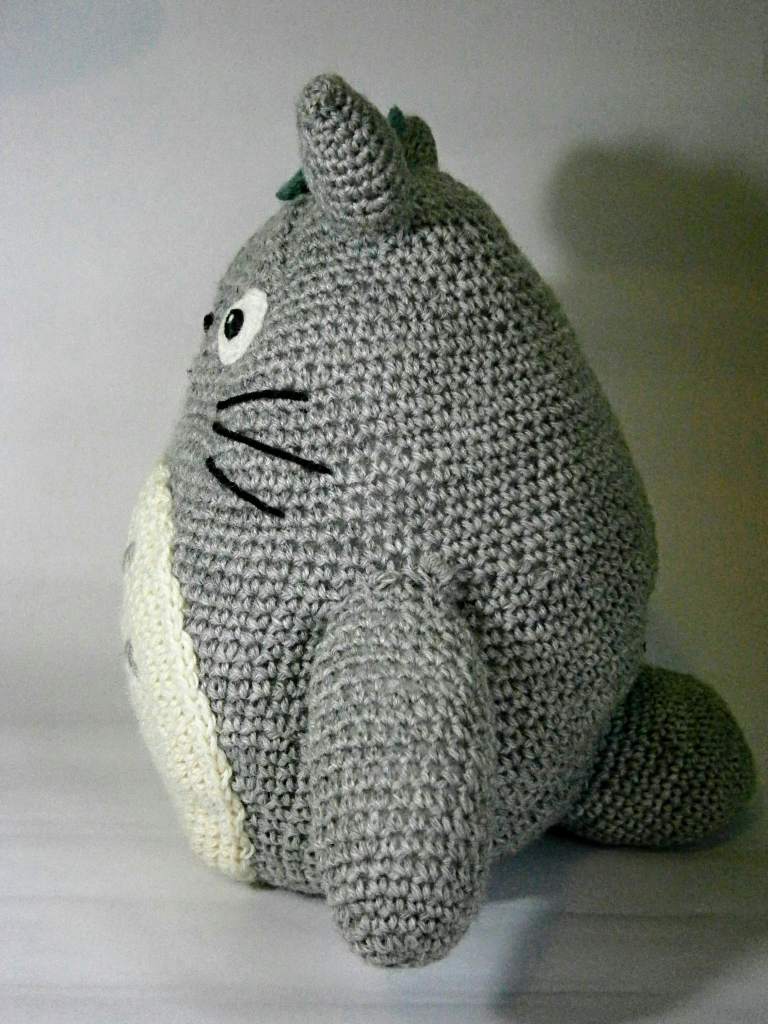
This Totoro is understuffed which you may be able to tell from the photo. This means that he is quite saggy in places and struggles to sit upright. This is because I waited until I had almost finsihed the closing to start stuffing and the opening was too small to compact the stuffing into the sides of the body. Nowadays, I start stuffing when I am halfway through the project and continue to stuff as I am decreasing
Getting the face right
I spent many hours trying to get Totoro’s face right. If you are familar with the film, you will know that Totoro has many facial expressions. As the thought of making all his teeth was too much, I opted for this easier expression where he has the leaf hat when standing in the rain.
I used felt to make the eyes and nose which I don’t tend to do now and instead I prefer to make facial features out of yarn so they blend into the rest of the amigurumi. That being said, even though they are made out of felt, the eyes and nose of my Tototo do not look out of place.
Final Thoughts
I greatly enjoyed making this Totoro and he still stis pride of place in my bedroom. I only wish that I had started with a smaller project such as the small White Totoro to learn the techquies before embarking on a larger piece.


Leave a comment